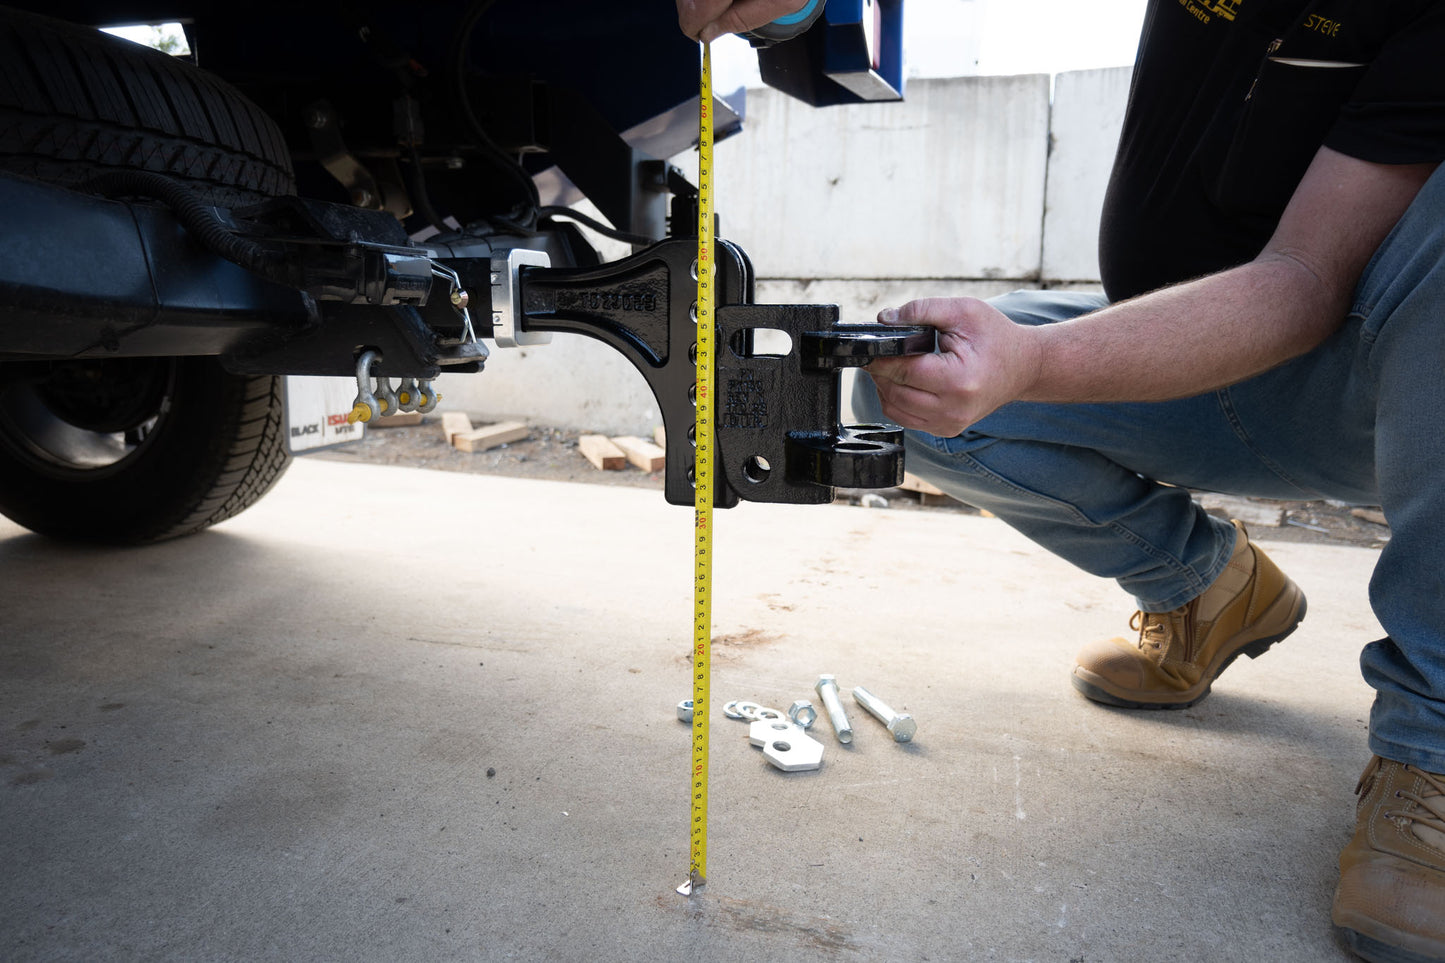
The goal of a weight distribution hitch is to make the tow vehicle and caravan level, allowing for the safest towing condition. Here's how you set one up properly.
Step 1: Determine Tow Ball Height
- Level the Caravan or Trailer: Park the caravan or trailer on a level surface, disconnected from the tow vehicle. Use the jockey wheel to adjust the front and rear heights until both are level. Confirm this with a tape measure.
- Measure Tow Ball Height: Measure the distance from the ground to the bottom edge of the tow ball coupling. This is your target tow ball height. Write down this measurement for later reference.

Step 2: Establish Tow Ball Weight
- Fully Load the Caravan: Ensure the caravan or trailer is fully loaded with your typical towing load.
- Measure the Tow Ball Weight: Use a ball weight scale to measure the weight supported by the tow ball.
- Record the Weight: Write down the weight indicated on the scale.
- Pick the Correct Distributing Bars: Ensure that the weight falls within the recommended range for your distributing bars. If they are too light, they will bend and will not give the most benefits to your setup. Photo below credit to Hayman Reese.

Step 3: Install the Hitch
- Insert the Drop Shank: Slide the drop shank into the hitch receiver on your tow vehicle and insert the locking pin.
- Adjust the Ball Mount Head: Slide the ball mount head up the shank until the tow ball mounting surface is at the same height as the tow ball height you measured earlier.
- Secure the Position: Insert the lower bolt to secure the position of the ball mount head.
- Level the Mounting Surface: Insert the top bolt and cam plates, ensuring the tow ball mounting surface is level horizontally.
- Tighten the Bolts: Use a torque wrench to tighten the bolts to the specified torque in the fitting instructions. Do not overtighten.
- Install the Tow Ball: Attach and tighten the tow ball to the ball mount head.


Step 4: Position the Snap-Up Brackets
- Determine Bracket Position: Measure the length of the spring bars you are using (indicated on the bars). Position the snap-up brackets on the caravan A-frame at a distance equal to the length of the spring bars from the centre of the tow ball coupling.
- Attach the Snap-Up Brackets: Attach the snap-up brackets to the A-frame at the measured position. When the spring bars are connected, the chain must hang at a 90 degree angle.

Step 5: Hook Up the Caravan
- Before you Hook up: Measure the height of the front and rear of the tow vehicle (under the wheel arches) before coupling the caravan. Record your measurement.
- Position the Tow Vehicle: Back the tow vehicle into place and lower the caravan coupling onto the tow ball. Lock the coupling in place.
Step 6: Connect the Spring Bars
- Prepare for Connection: Use the jockey wheel to raise the caravan A-frame slightly above level. This will lift the rear of the tow vehicle, making it easier to connect the spring bars.
- Attach the Spring Bars: Place both spring bars into the ball mount head. Attach the connecting chains to the hooks on the snap-up brackets. It is recommended to start with 5 working links on both sides.
- Engage the Snap-Up Brackets: Use the snap-up handle to lever the snap-up brackets into place and attach the safety pins. Ensure that the spring bars are firmly in position.

Step 7: Adjust Weight Distribution
- Check Vehicle Height: Wind the jockey wheel up to transfer the load fully to the vehicle. Measure the front and rear vehicle heights again.
- Adjust Spring Bars: If the rear of the vehicle goes down more than the front, use fewer working links on the chains. If the front goes down more than the rear, use more working links. Repeat the process until the vehicle is level or within a tolerance of 12mm between the front and rear.
- Fine-Tuning: If necessary, half-link the setup by placing a 12mm bolt between two links for finer adjustments.

Step 8: Check Spring Bar Clearance
- Measure Ground Clearance: Ensure that there is at least 125mm of clearance between the end of the spring bars and the ground. If there is not enough clearance, adjust the angle and height of the spring bars by rotating the adjusting cams on the ball mount head.
